
- Sản phẩm & Dịch vụSản phẩm & Dịch vụ
- Giải phápGiải pháp
- Bảng giáBảng giá
- Công tyCông ty
- Tài liệuTài liệu

vi
vi
Chuyên mục với các bài viết hướng dẫn, nghiên cứu và phân tích chi tiết về kỹ thuật, các xu hướng công nghệ mới nhất dành cho lập trình viên.

Technical Writer

I have over 5 years of experience writing technical documentation for tech products, making them accessible and user-friendly. My focus is always on providing clear and precise information. @#@ Tôi đã có hơn 5 năm kinh nghiệm viết tài liệu kỹ thuật cho các sản phẩm công nghệ, giúp người dùng dễ dàng tiếp cận và sử dụng. Tôi luôn tập trung vào việc cung cấp thông tin chính xác và dễ hiểu.
Thảo luận (0)
Đăng nhập để thảo luận
Bài hướng dẫn này sẽ giúp bạn có kinh nghiệm thực tế về cách dùng Spinner trong Android để tạo một menu thả xuống nhằm truyền dữ liệu bằng Bundle (đối tượng lưu trữ dữ liệu tạm) và hiển thị thông báo pop-up bằng Toast (thông báo nhỏ xuất hiện tạm thời).

Ta sẽ tạo một ứng dụng Android sử dụng một spinner đơn giản cho phép chọn một mục từ danh sách. Dữ liệu trong Spinner sẽ là dữ liệu tĩnh. Khi chọn một mục từ spinner, một thông báo Toast sẽ được hiển thị. Để truyền dữ liệu dưới dạng Bundle giữa các activity, ta sẽ dùng một nút bấm để gửi một Intent và hiển thị dữ liệu đã được truyền qua ở màn hình tiếp theo.
Spinner chỉ đơn giản là một danh sách thả xuống tương tự như trong các ngôn ngữ lập trình khác, ví dụ như trên các trang HTML. Trong Android, Spinner được dùng để chọn một giá trị từ một tập hợp các giá trị.
Ở trạng thái mặc định, Spinner sẽ hiển thị giá trị đang được chọn. Khi nhấn vào Spinner, một menu thả xuống sẽ hiện ra với tất cả các giá trị khả dụng, cho phép người dùng chọn một giá trị mới. Spinner trong Android được liên kết với một AdapterView. Do đó, ta cần phải thiết lập lớp adapter cho Spinner.
File XML dưới đây cho thấy layout của một spinner điển hình trong Android, bao gồm một nhãn văn bản và một thẻ spinner.
<?xml version="1.0" encoding="utf-8"?>
<LinearLayout xmlns:android="<https://schemas.android.com/apk/res/android>"
android:orientation="vertical"
android:padding="10dip"
android:layout_width="fill_parent"
android:layout_height="wrap_content">
<!-- Text Label -->
<TextView
android:layout_width="fill_parent"
android:layout_height="wrap_content"
android:layout_marginTop="10dip"
android:text="Category:"
android:layout_marginBottom="5dp"
/>
<!-- Spinner Element -->
<Spinner
android:id="@+id/spinner"
android:layout_width="fill_parent"
android:layout_height="wrap_content"
android:prompt="@string/spinner_title"
/>
</LinearLayout>
Đoạn mã sau minh họa cách sử dụng Spinner trong lớp activity.
Spinner spinner = (Spinner) findViewById(R.id.spinner);
Hãy cùng tạo một ứng dụng để minh họa việc truyền giá trị được chọn từ Spinner sang màn hình tiếp theo bằng Bundle, đồng thời hiển thị một thông báo Toast về giá trị đã chọn.
Hình ảnh dưới đây cho thấy cấu trúc project trong Android Studio sử dụng spinner.
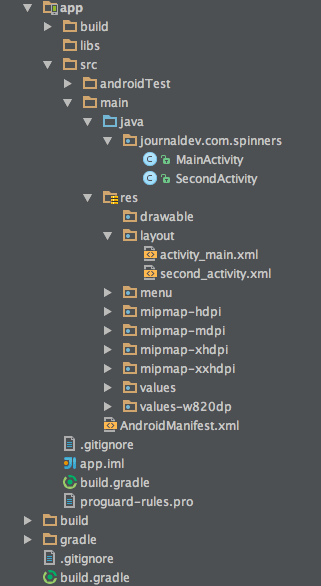
Hãy bắt đầu với layout của lớp MainActivity. Ta chỉ cần thêm một Button vào file basic_spinner.xml.
<RelativeLayout xmlns:android="<https://schemas.android.com/apk/res/android>"
xmlns:tools="<https://schemas.android.com/tools>" android:layout_width="match_parent"
android:layout_height="match_parent" android:paddingLeft="@dimen/activity_horizontal_margin"
android:paddingRight="@dimen/activity_horizontal_margin"
android:paddingTop="@dimen/activity_vertical_margin"
android:paddingBottom="@dimen/activity_vertical_margin" tools:context=".MainActivity">
<LinearLayout
android:orientation="vertical"
android:padding="10dip"
android:id="@+id/linear_layout"
android:layout_width="fill_parent"
android:layout_height="wrap_content">
<!-- Text Label -->
<TextView
android:layout_width="fill_parent"
android:layout_height="wrap_content"
android:layout_marginTop="10dip"
android:text="Category:"
android:layout_marginBottom="5dp"
/>
<!-- Spinner Element -->
<Spinner
android:id="@+id/spinner"
android:layout_width="fill_parent"
android:layout_height="wrap_content"
android:prompt="@string/spinner_title"
/>
</LinearLayout>
<Button
android:layout_width="wrap_content"
android:layout_height="wrap_content"
android:text="NEXT"
android:id="@+id/button"
android:layout_alignParentBottom="true"
android:layout_centerHorizontal="true"
android:layout_marginBottom="137dp" />
</RelativeLayout>
Layout của SecondActivity như sau:
<RelativeLayout xmlns:android="<https://schemas.android.com/apk/res/android>"
xmlns:tools="<https://schemas.android.com/tools>" android:layout_width="match_parent"
android:layout_height="match_parent" android:paddingLeft="@dimen/activity_horizontal_margin"
android:paddingRight="@dimen/activity_horizontal_margin"
android:paddingTop="@dimen/activity_vertical_margin"
android:paddingBottom="@dimen/activity_vertical_margin" tools:context=".MainActivity">
<TextView
android:layout_width="wrap_content"
android:layout_height="wrap_content"
android:textAppearance="?android:attr/textAppearanceMedium"
android:text="Empty"
android:id="@+id/txt_bundle"
android:layout_alignParentTop="true"
android:layout_centerHorizontal="true"
android:layout_marginTop="103dp" />
</RelativeLayout>
Đây là file Android Manifest AndroidManifest.xml.
<?xml version="1.0" encoding="utf-8"?>
<manifest xmlns:android="<https://schemas.android.com/apk/res/android>"
package="journaldev.com.spinners" >
<application
android:allowBackup="true"
android:icon="@mipmap/ic_launcher"
android:label="@string/app_name"
android:theme="@style/AppTheme" >
<activity
android:name=".MainActivity"
android:label="@string/app_name" >
<intent-filter>
<action android:name="android.intent.action.MAIN" />
<category android:name="android.intent.category.LAUNCHER" />
</intent-filter>
</activity>
<activity android:name=".SecondActivity"/>
</application>
</manifest>
Các lớp Java MainActivity và SecondActivity được định nghĩa như sau.
package journaldev.com.spinners;import android.app.Activity; import android.content.Intent; import android.support.v7.app.AppCompatActivity; import android.os.Bundle; import android.view.Menu; import android.view.MenuItem; import android.view.View; import android.widget.AdapterView; import android.widget.ArrayAdapter; import android.widget.Button; import android.widget.Spinner; import android.widget.Toast;
import java.util.ArrayList; import java.util.List;
public class MainActivity extends Activity implements AdapterView.OnItemSelectedListener { @Override public void onCreate(Bundle savedInstanceState) { super.onCreate(savedInstanceState); setContentView(R.layout.activity_main);
// Spinner element final Spinner spinner = (Spinner) findViewById(R.id.spinner); Button button=(Button)findViewById(R.id.button); // Spinner click listener spinner.setOnItemSelectedListener(this); // Spinner Drop down elements List<String> categories = new ArrayList<String>(); categories.add("Item 1"); categories.add("Item 2"); categories.add("Item 3"); categories.add("Item 4"); categories.add("Item 5"); categories.add("Item 6"); // Creating adapter for spinner ArrayAdapter<String> dataAdapter = new ArrayAdapter<String>(this, android.R.layout.simple_spinner_item, categories); // Drop down layout style - list view with radio button dataAdapter.setDropDownViewResource(android.R.layout.simple_spinner_dropdown_item); // attaching data adapter to spinner spinner.setAdapter(dataAdapter); button.setOnClickListener(new View.OnClickListener() { @Override public void onClick(View v) { Intent intent= new Intent(MainActivity.this,SecondActivity.class); intent.putExtra("data",String.valueOf(spinner.getSelectedItem())); startActivity(intent); } }); } @Override public void onItemSelected(AdapterView<?> parent, View view, int position, long id) { // On selecting a spinner item String item = parent.getItemAtPosition(position).toString(); // Showing selected spinner item Toast.makeText(parent.getContext(), "Selected: " + item, Toast.LENGTH_LONG).show(); } public void onNothingSelected(AdapterView<?> arg0) { // TODO Auto-generated method stub }}
package journaldev.com.spinners;

import android.app.Activity;
import android.os.Bundle;
import android.widget.TextView;

public class SecondActivity extends Activity {

    @Override
    protected void onCreate(Bundle savedInstanceState) {
        super.onCreate(savedInstanceState);
        setContentView(R.layout.second_activity);

        TextView  textView=(TextView) findViewById(R.id.txt_bundle);
        Bundle bundle=getIntent().getExtras();
        String data=bundle.get("data").toString();
        textView.setText(data);
    }
}
Trong đoạn code trên, ta đã hiển thị một thông báo Toast khi một mục từ menu thả xuống của spinner được chọn. Khi ta nhấn nút, ứng dụng truyền mục đã chọn từ spinner sang activity tiếp theo dưới dạng một giá trị chuỗi bằng Android Bundle. Sau đó, dữ liệu được lấy ra từ Bundle và hiển thị trong một TextView.
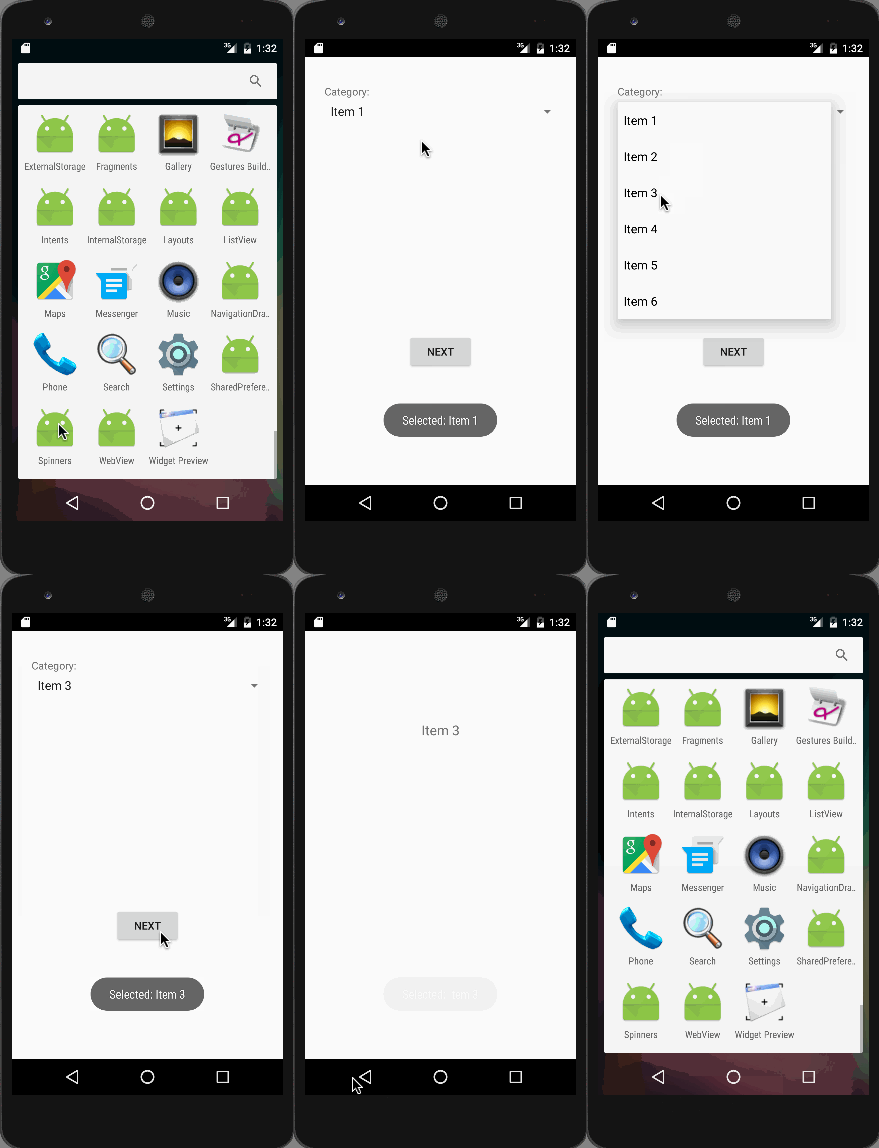
Ảnh chụp màn hình của ứng dụng được hiển thị bên dưới. Khi chạy ứng dụng này trong trình giả lập, màn hình đầu tiên cho thấy nội dung danh sách thả xuống khi spinner được mở.
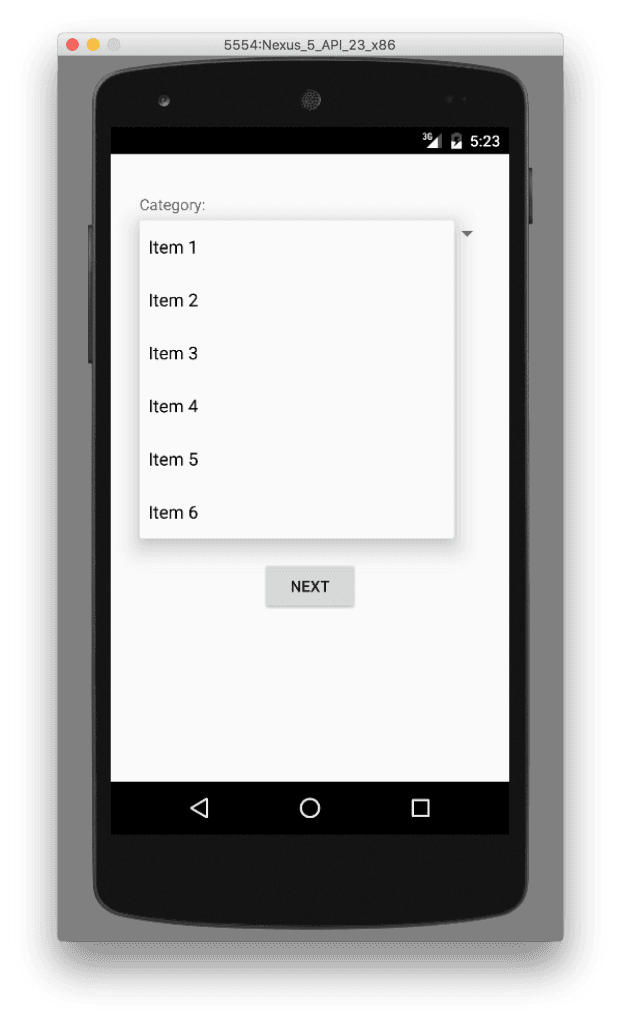
Sau khi một mục được chọn, thông báo Toast sẽ xuất hiện trong một khoảng thời gian ngắn.
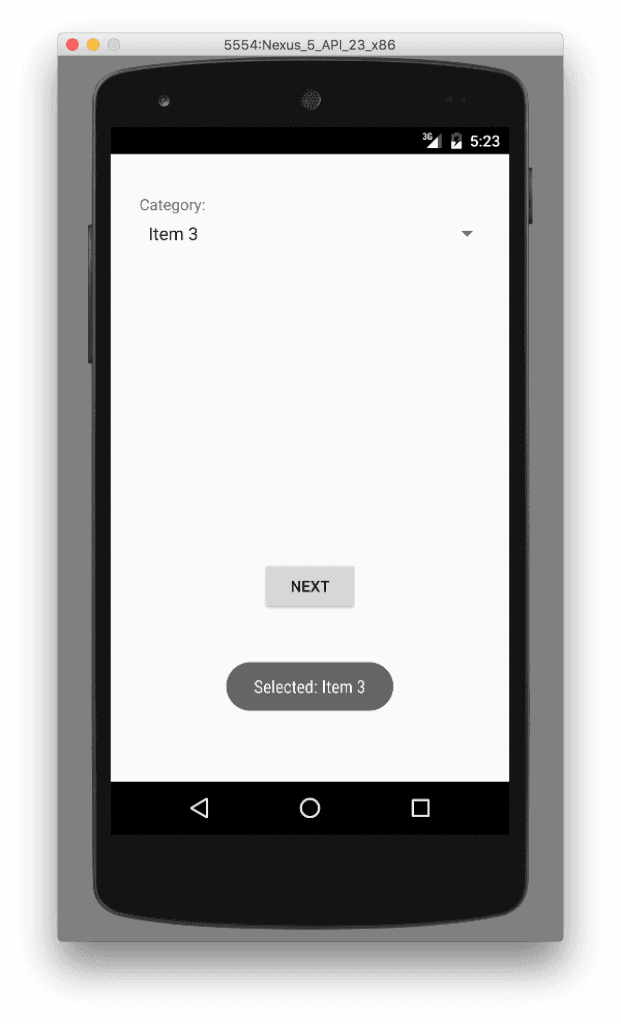
Một lúc sau, thông báo Toast sẽ biến mất như trong hình dưới đây. Ta vẫn có thể nhấn vào nút Next.
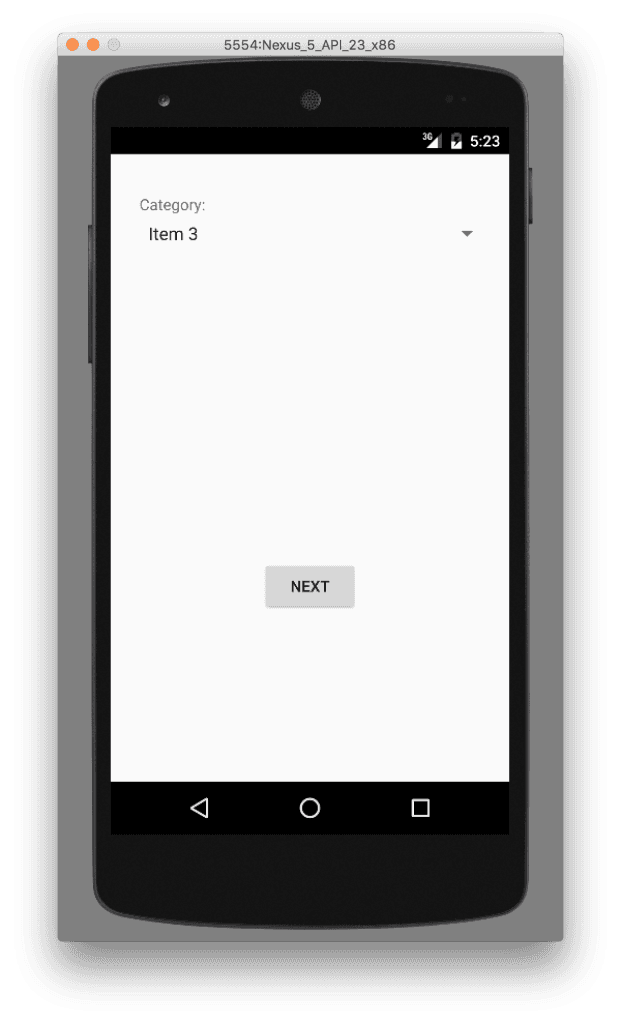
Cuối cùng, ở screen thứ hai, mục được chọn từ danh sách thả xuống sẽ được lấy ra bằng Bundle và hiển thị trong TextView.
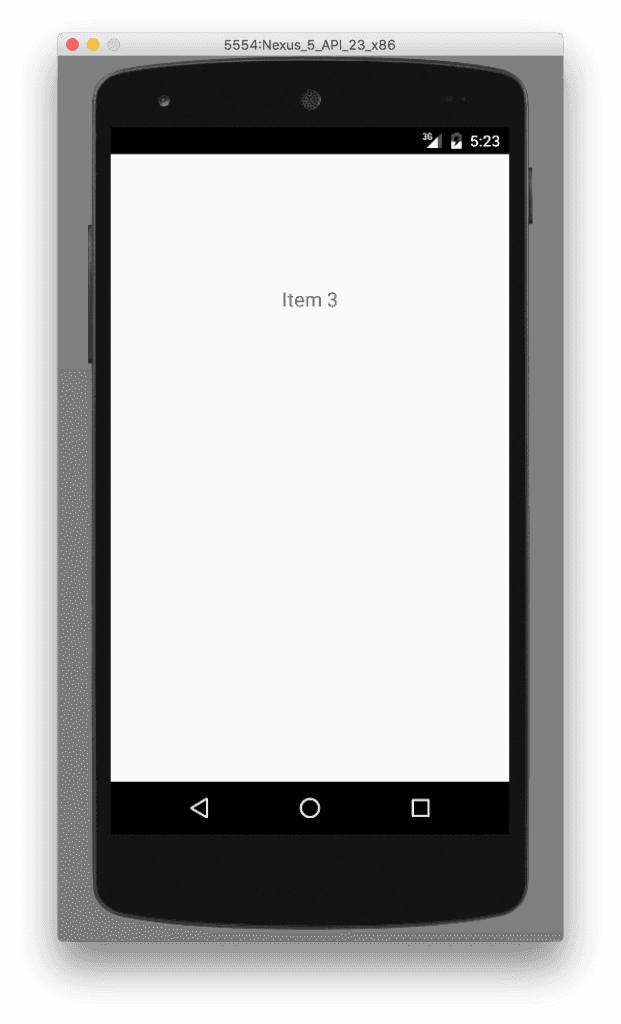
Dưới đây là một ví dụ về quá trình chạy ứng dụng spinner trên trình giả lập.
Bạn có thể tải xuống project mẫu sử dụng Spinner trong Android ở trên từ liên kết này. Để học cách mở rộng ví dụ trên, bạn có thể tìm hiểu thêm về ListView với các bài hướng dẫn trong blog của chúng tôi.